Unlock your chest’s full potential with the chest fly exercise. This comprehensive guide delves into the intricacies of performing chest flies, from fundamental techniques to advanced variations. Learn how to target specific muscle groups, maximize benefits, and perform the exercise safely and effectively. Discover the best form, common mistakes to avoid, and how to customize the exercise for various fitness levels.
This detailed guide covers everything from proper form and technique to workout routines and safety precautions, ensuring you can safely and effectively incorporate chest fly into your training program. Whether you’re a beginner or an experienced lifter, this guide provides tailored advice and variations to optimize your workout experience.
Introduction to Chest Fly Exercise
The chest fly is a fundamental exercise in strength training, primarily targeting the pectoral muscles (chest). This isolation exercise allows for focused development of the chest, contributing to overall upper body strength and aesthetic development. Proper execution is crucial for maximizing benefits and minimizing risk of injury.This exercise plays a vital role in a well-rounded workout routine, contributing to muscular balance and overall physique enhancement.
Understanding its variations and proper execution will ensure optimal results and prevent potential issues.
Chest Fly Benefits
Incorporating chest flies into a workout routine offers several advantages. It helps build and strengthen the pectoral muscles, which are crucial for pushing movements and overall upper body strength. This exercise also promotes shoulder stabilization and improves posture. Moreover, the controlled movements can help enhance body awareness and coordination.
Common Chest Fly Variations
Numerous variations of the chest fly exist, each targeting the chest muscles with slight differences in muscle engagement and difficulty. These variations often incorporate different equipment or implement slight adjustments in form, impacting the intensity and focus of the exercise.
Chest Fly Variations Comparison
| Variation | Equipment | Muscle Engagement | Difficulty |
|---|---|---|---|
| Standard Chest Fly | Dumbbells | Primary: Pectoralis major (chest), Secondary: Anterior deltoids (front shoulders), Serratus anterior (ribs) | Moderate |
| Cable Chest Fly | Cable machine | Primary: Pectoralis major (chest), Secondary: Anterior deltoids (front shoulders) | Moderate |
| Incline Chest Fly | Dumbbells, or a weight bench | Primary: Upper Pectoralis major (upper chest), Secondary: Anterior deltoids (front shoulders) | Moderate to High |
| Decline Chest Fly | Dumbbells, or a weight bench | Primary: Lower Pectoralis major (lower chest), Secondary: Anterior deltoids (front shoulders) | Moderate to High |
| Resistance Band Chest Fly | Resistance bands | Primary: Pectoralis major (chest), Secondary: Anterior deltoids (front shoulders) | Low to Moderate |
Proper Form and Technique

Executing chest fly exercises with proper form is crucial for maximizing results and minimizing the risk of injury. Correct posture and technique ensure engagement of the target muscles and prevent strain on other areas of the body. Maintaining consistent form throughout the exercise is essential for achieving the desired muscle activation.Understanding the nuances of proper hand placement, grip, and the step-by-step procedure empowers individuals to perform chest flies effectively and safely.
This detailed explanation will provide a comprehensive guide to executing this exercise correctly.
Posture and Positioning
Proper posture is paramount for a safe and effective chest fly. Maintaining a neutral spine and a stable core throughout the exercise prevents unnecessary stress on the lower back. Position yourself on a flat bench or the floor, ensuring your body is aligned from head to heels. Your feet should be flat on the ground or bench, providing a solid base for stability.
Avoid arching your back or allowing your hips to lift off the bench. Keep your core engaged throughout the entire movement.
Hand Placement and Grip
Optimal hand placement on the weights is critical for targeted muscle activation. Grip the weights with a slight outward rotation of your palms, allowing a more natural and controlled movement. The hands should be positioned slightly wider than shoulder-width apart. This wider grip targets the outer chest muscles more effectively. A comfortable grip is essential to prevent fatigue and potential injury.
Step-by-Step Procedure
Executing chest flies requires a methodical approach. Follow these steps to ensure correct form and maximize results.
- Begin by lying flat on a bench or the floor with your feet planted firmly on the ground. Hold the weights in both hands with a slight outward rotation of your palms, ensuring a comfortable grip.
- Keep your core engaged, maintaining a stable posture. Inhale deeply to prepare for the exercise.
- Slowly lower the weights outwards, keeping your elbows slightly bent, until the weights are positioned just above your chest. Ensure your elbows are not locked, as this can increase strain on your shoulder joints.
- Maintain a controlled and steady movement throughout the exercise. Pause for a brief moment at the bottom of the movement.
- Slowly return the weights to the starting position, maintaining control and proper form. Exhale as you bring the weights back together.
- Repeat the movement for the desired number of repetitions.
Common Mistakes and Corrections
| Mistake | Correction |
|---|---|
| Rounding the back or allowing the lower back to arch | Maintain a neutral spine throughout the exercise. Engage your core muscles to stabilize your torso. |
| Using momentum instead of controlled movement | Focus on slow, controlled movements. Avoid jerking or swinging the weights. |
| Locking elbows during the movement | Keep your elbows slightly bent throughout the entire exercise. This prevents strain on your shoulder joints. |
| Pulling the weights inward instead of outward | Focus on a smooth outward movement, keeping the weights parallel to the floor. |
| Using an excessive range of motion | Maintain a controlled range of motion, avoiding movements that put excessive strain on your shoulders. |
Variations and Modifications
Exploring different chest fly variations allows individuals to tailor the exercise to their specific needs and fitness levels. Modifications can adjust intensity, target specific muscle groups, and accommodate various limitations. This section details equipment options, variations for different fitness levels, and modifications for intensity adjustments, providing examples suitable for beginners and advanced users.
Equipment Variations
Different equipment options can significantly alter the challenge and focus of the chest fly exercise. These variations offer alternative ways to engage the chest muscles and can be beneficial for individuals looking to progress or adapt the exercise.
- Resistance Bands: Resistance bands provide variable resistance, making them suitable for beginners. They are portable, cost-effective, and can be adjusted for varying levels of intensity. Starting with lighter bands allows for controlled movement and focus on proper form before increasing resistance.
- Dumbbells: Dumbbells offer a wide range of weight options, allowing for progressive overload. Using dumbbells allows for independent control of each arm, promoting isolation and targeted muscle engagement. Gradually increasing weight is crucial for effective strength development.
- Cable Machines: Cable machines offer consistent tension throughout the entire range of motion, which can enhance stability and control. They provide a more controlled environment for maintaining proper form, especially beneficial for individuals learning proper technique.
- Chest Fly Machines: These machines provide a guided motion, making them easier to learn and perform safely. They are often preferred by beginners due to the reduced risk of injury from improper form.
Variations for Different Fitness Levels
Adapting the chest fly exercise to various fitness levels is essential for maximizing results and preventing injuries. By adjusting the weight and range of motion, the exercise can be modified to challenge individuals at all stages of their fitness journey.
- Beginners: Beginners should start with lighter weights or resistance bands. A reduced range of motion, focusing on controlled movements, is recommended. Prioritize maintaining proper form over lifting heavy weights.
- Intermediate: Intermediate users can gradually increase weight or resistance while maintaining proper form. A full range of motion can be incorporated while maintaining controlled movements. Adding sets and repetitions is a viable approach for increased intensity.
- Advanced: Advanced users can use heavier weights or resistance bands, with a full range of motion. Adding variations such as explosive movements or incorporating different grips can challenge the muscles further.
Intensity Modifications
Adjusting the intensity of the chest fly exercise allows for gradual progression and prevents injury. Variations in weight, repetitions, and sets provide a means for progressive overload and tailored workouts.
- Weight Adjustments: Reducing the weight used allows for improved focus on form and controlled movements, while increasing weight challenges the muscles and promotes strength development. Proper weight selection depends on individual strength and experience.
- Repetition and Set Variations: Altering the number of repetitions and sets allows for adjustments to the workout duration and intensity. Reducing repetitions allows for a longer workout, while increasing repetitions provides a more challenging, shorter workout.
- Rest Intervals: Increasing rest intervals between sets allows for recovery and prevents fatigue, while decreasing rest intervals increases intensity and promotes cardiovascular conditioning. Proper rest intervals are important for maximizing performance and preventing injury.
Examples of Variations
Specific variations cater to different experience levels and preferences.
- Beginner (Resistance Bands):
- Anchor the resistance band to a sturdy object.
- Hold the band with both hands, palms facing each other.
- Slowly pull the band apart, maintaining a straight posture.
- Return to the starting position.
- Advanced (Dumbbells):
- Hold a dumbbell in each hand, palms facing each other.
- Extend your arms outward until they are parallel to the floor.
- Lower the dumbbells in a controlled manner, maintaining a straight posture.
- Return to the starting position.
Safety Precautions and Considerations

Proper form and technique are crucial for maximizing the benefits of chest fly exercises while minimizing the risk of injury. Understanding and implementing safety precautions is equally important, ensuring a safe and effective workout experience. Prioritizing safety allows you to perform the exercise correctly and achieve your fitness goals without compromising your well-being.Careful attention to safety measures, including proper warm-up and cool-down, proper weight selection, and listening to your body, is paramount to avoiding potential injuries.
This proactive approach will help you experience the full benefits of chest fly while maintaining your physical health.
Essential Safety Precautions
Implementing safety precautions is essential for a safe and effective chest fly workout. These precautions mitigate the risk of injury and maximize the positive outcomes of the exercise. Adherence to these guidelines will help you prevent potential problems and focus on the benefits of the exercise.
- Proper Warm-up: A thorough warm-up prepares your muscles for the exertion of chest fly. This involves dynamic stretches targeting the chest, shoulders, and back muscles. Examples include arm circles, shoulder rotations, and chest stretches, ensuring adequate blood flow to the muscles. A well-executed warm-up reduces the risk of strains and tears by increasing muscle flexibility and blood flow.
Failing to warm up properly significantly increases the risk of injury.
- Weight Selection: Choosing an appropriate weight is critical. Begin with a weight that allows you to maintain proper form throughout the exercise. Gradually increase the weight as you gain strength and confidence, ensuring you can still maintain the correct form. Using excessive weight compromises form and increases the likelihood of injury.
- Spotting: When using heavy weights, having a spotter is highly recommended. A spotter can provide support and help you maintain control if you experience any difficulties. This is particularly crucial during the eccentric phase of the exercise, where the weight is lowered.
- Listen to Your Body: Pay close attention to any pain or discomfort. If you feel pain, stop the exercise immediately. Continuing to exercise with pain can lead to serious injuries. Listen to your body and adjust the weight or exercise as needed to avoid pain.
- Proper Form: Maintain correct form throughout the exercise. Improper form can put undue stress on your joints and muscles, increasing the risk of injury. Consistency in proper form is essential for safety.
Potential Injuries and Prevention
Understanding potential injuries and their prevention strategies is vital for safe exercise. By understanding these risks, you can take proactive measures to minimize the likelihood of injury.
| Injury | Prevention |
|---|---|
| Shoulder Impingement | Maintain a controlled range of motion. Avoid excessive external rotation. Use lighter weights to minimize stress on the shoulder joint. |
| Rotator Cuff Tear | Prioritize proper form, focusing on controlled movements and avoiding jerky motions. Use lighter weights and progressively increase the load as strength improves. Adequate warm-up is essential. |
| Biceps Tendonitis | Ensure proper form and avoid overextending the biceps. Maintain a controlled tempo, avoiding sudden movements. Gradually increase the weight to avoid overloading the biceps. |
| Wrist Strain/Sprain | Use a neutral wrist position throughout the exercise. Avoid hyperextending or hyperflexing the wrist. Ensure proper grip to avoid excessive stress on the wrist. |
| Back Injury | Maintain a neutral spine throughout the exercise. Avoid arching or rounding your back. Ensure proper core engagement to stabilize the spine during the exercise. |
Cool-down Routine
A cool-down routine following the chest fly exercise is important for gradually reducing muscle tension and promoting recovery. It helps prevent delayed-onset muscle soreness (DOMS) and supports optimal muscle recovery.
- Static stretching is crucial. Hold each stretch for 20-30 seconds, focusing on the chest, shoulders, and back muscles. Examples include chest stretches, shoulder stretches, and back stretches. This promotes flexibility and reduces muscle soreness.
Workout Routines and Program Design
Chest fly exercises are a valuable addition to various workout programs, contributing to overall chest development and strength. Properly integrating them into a structured routine maximizes their effectiveness and minimizes risk of injury. This section explores different workout programs incorporating chest fly, tailored for various fitness levels.
Beginner Workout Plan (Focus on Form and Control)
This routine prioritizes mastering proper chest fly technique before increasing weight or intensity. Consistent practice with controlled movements forms a solid foundation for future progression.
- Warm-up (5-10 minutes): Dynamic stretching, such as arm circles, shoulder rotations, and light cardio, prepares the muscles for exercise.
- Chest Fly (3 sets of 10-12 repetitions): Use a light weight, focusing on maintaining a controlled tempo. Ensure the movement originates from the chest muscles, not the shoulders or arms.
- Push-ups (3 sets to failure): An excellent compound exercise targeting the chest, shoulders, and triceps. If push-ups are challenging, consider incline push-ups against a bench or wall.
- Dumbbell Bench Press (3 sets of 8-10 repetitions): Another compound exercise that further targets the chest muscles.
- Cool-down (5-10 minutes): Static stretching, holding each stretch for 20-30 seconds, promotes muscle recovery and flexibility.
Intermediate Workout Plan (Incorporating Progressive Overload)
This routine builds upon the foundation of the beginner plan, introducing progressive overload to stimulate muscle growth. Progressive overload involves gradually increasing the weight, sets, or repetitions over time.
- Warm-up (10-15 minutes): Increase the duration and intensity of the warm-up to prepare for a more challenging workout.
- Chest Fly (3 sets of 12-15 repetitions): Increase the weight slightly compared to the beginner routine.
- Incline Dumbbell Press (3 sets of 10-12 repetitions): Targets the upper chest, a key area often neglected.
- Decline Dumbbell Press (3 sets of 8-10 repetitions): Targets the lower chest, promoting balanced development.
- Cable Flyes (3 sets of 12-15 repetitions): Utilizes resistance cables for a more controlled and challenging movement.
- Cool-down (5-10 minutes): Maintain the static stretching for recovery.
Advanced Workout Plan (Intensity and Volume Adjustments)
This routine focuses on intensity and volume, pushing the body beyond its previous limits. Adjustments in weight, sets, and repetitions allow for a more challenging workout.
- Warm-up (15-20 minutes): A more intense warm-up, including plyometrics and dynamic stretching.
- Chest Fly (4 sets of 10-12 repetitions): Increase the weight and sets for greater intensity and volume.
- Barbell Bench Press (3 sets of 6-8 repetitions): A high-intensity compound exercise for maximal muscle engagement.
- Dips (3 sets to failure): A bodyweight exercise that effectively targets the chest and triceps, ideal for advanced users.
- Supersets (Chest Fly and Dumbbell Bench Press): Performing two exercises back-to-back with minimal rest between sets to increase workout intensity.
- Cool-down (10-15 minutes): Focus on static stretching, holding each stretch for 30-60 seconds, for optimal recovery.
Common Mistakes and Troubleshooting

Proper form is crucial for maximizing the effectiveness and minimizing the risk of injury during chest fly exercises. Understanding common errors and their solutions empowers individuals to perform the exercise safely and efficiently, thereby achieving optimal results.Identifying and correcting these errors is vital to prevent potential injuries and ensure the exercise targets the intended muscle groups. Addressing these issues can also lead to a more enjoyable and productive workout experience.
Common Form Errors
Incorrect form during chest fly exercises can lead to reduced effectiveness and potential injuries. Awareness of these common errors is key to maintaining proper technique.
- Slouched posture: Maintaining a neutral spine throughout the exercise is essential. Rounding the back during the movement can place undue stress on the lower back and potentially compromise the exercise’s effectiveness by reducing the range of motion and engaging the wrong muscles.
- Using momentum instead of controlled movements: Allowing momentum to drive the weights can cause instability, potentially leading to injury and minimizing the targeted muscle activation. Controlled movements ensure that the chest muscles are actively engaged throughout the exercise.
- Pulling with the elbows: The motion should be controlled and driven by the chest muscles, not the elbows. Using the elbows to pull the weights can lead to shoulder strain and hinder the effectiveness of the exercise, especially in the later stages of the movement.
- Insufficient range of motion: Failing to fully extend the arms during the lowering phase can prevent the chest muscles from being fully stretched and contracted, which reduces the effectiveness of the exercise. Achieving a full range of motion is essential for maximizing muscle engagement.
- Lifting the weights too high: Lifting the weights too high can create an unnecessary strain on the shoulder joint. This should be avoided to prevent potential shoulder impingement or injuries.
Troubleshooting Guide
This guide provides a structured approach to addressing common issues during chest fly exercises.
- Problem: Experiencing pain in the shoulder joint.
Solution: Reduce the weight, ensure proper form, and maintain a controlled movement. If pain persists, consult a healthcare professional or physical therapist. Listen to your body and modify the exercise or take a break if needed. - Problem: Feeling pain in the lower back.
Solution: Maintain a neutral spine throughout the exercise. Ensure the core is engaged and stabilize the back. If pain persists, modify the exercise or consult a healthcare professional or physical therapist. - Problem: The chest is not being targeted adequately.
Solution: Ensure a controlled movement and focus on squeezing the chest muscles during the contraction phase. Check if the elbows are not pulling the weights instead of the chest. Adjust the weight if necessary. - Problem: Feeling fatigued in the shoulder muscles.
Solution: Reduce the weight or the number of repetitions. Maintain a controlled movement, and ensure the elbows are not pulling the weights instead of the chest. Rest between sets to allow for recovery.
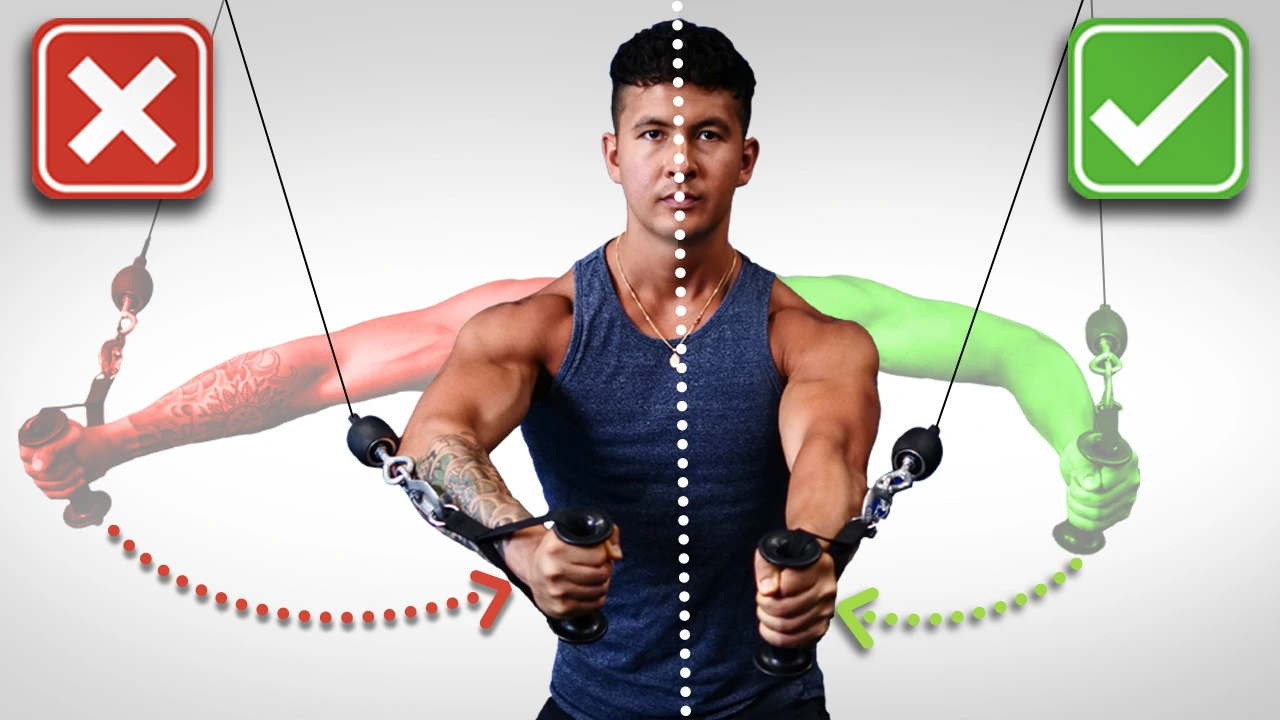
Visual Representation and Illustrations

Visual aids are crucial for understanding and mastering the chest fly exercise. Proper visualization allows for a deeper understanding of the correct form, muscle engagement, and overall movement pattern. Clear illustrations help to identify potential errors and ensure consistent execution.Detailed representations of the chest fly, including different angles and stages of the exercise, are vital for effectively learning the technique.
This section provides a visual guide to help you understand the nuances of the exercise, promoting better results and reducing the risk of injury.
Proper Chest Fly Form Illustration
This illustration depicts a person performing a chest fly with correct form and posture. The individual is positioned on a flat bench, with their core engaged and back pressed firmly against the bench. Their feet are flat on the floor, providing stability. Their shoulders are relaxed, and their neck is in a neutral position, avoiding any strain.
The hands are positioned slightly wider than shoulder-width apart, palms facing each other. The elbows are slightly bent, creating a natural arc of motion.
Stages of the Chest Fly Exercise
The following steps illustrate the different stages of the chest fly, emphasizing proper form and technique:
- Starting Position: The individual lies supine on a bench, with their core engaged and back flat against the bench. Hands are positioned slightly wider than shoulder-width apart, holding the dumbbells. Elbows are slightly bent, and palms face each other.
- Inhaling and Preparation: The person inhales deeply and prepares for the movement by engaging their core and stabilizing their body. This crucial step ensures proper form and minimizes the risk of injury.
- Lowering the Dumbbells: The individual slowly lowers the dumbbells towards the chest, maintaining the slight bend in their elbows. The motion should be controlled and deliberate, focusing on the chest muscles.
- Contracting the Chest Muscles: As the dumbbells approach the chest, the chest muscles contract to bring the weights together. The elbows should not fully straighten.
- Lifting the Dumbbells: The individual slowly lifts the dumbbells back to the starting position, maintaining control and engaging the chest muscles throughout the movement. The elbows remain slightly bent.
- Exhaling and Completing the Repetition: The person exhales as they complete the repetition, returning to the starting position.
Angles of the Chest Fly Exercise
Viewing the chest fly from different angles provides a more comprehensive understanding of the exercise. The following angles highlight the correct posture and muscle engagement:
- Front View: The front view emphasizes the proper alignment of the body, ensuring that the back remains flat on the bench. The hands are slightly wider than shoulder-width, and the elbows are maintained at a slight bend throughout the exercise. This angle is vital for identifying any spinal deviations.
- Side View: The side view showcases the correct elbow position and ensures that the elbows remain close to the body. This view highlights the proper contraction of the chest muscles and prevents unnecessary stress on the shoulders.
- Overhead View: This perspective allows for a clear view of the hand position and ensures that the dumbbells are moving in a smooth arc, and not exceeding the shoulder height during the exercise.
Outcome Summary
In conclusion, mastering the chest fly involves understanding proper form, variations for different fitness levels, safety precautions, and effective workout routines. This guide provides a complete roadmap for incorporating chest fly into your fitness journey, enabling you to achieve optimal results and prevent potential injuries. Remember to listen to your body, adjust the weight as needed, and consistently practice the techniques Artikeld here for a rewarding and safe workout experience.